Creating a New Android Project
Pretty straight forward :,> Open android studio
> Go to 'Start a new Android Studio Project'
- After creating several projects, they'll always be listed at the left pane.

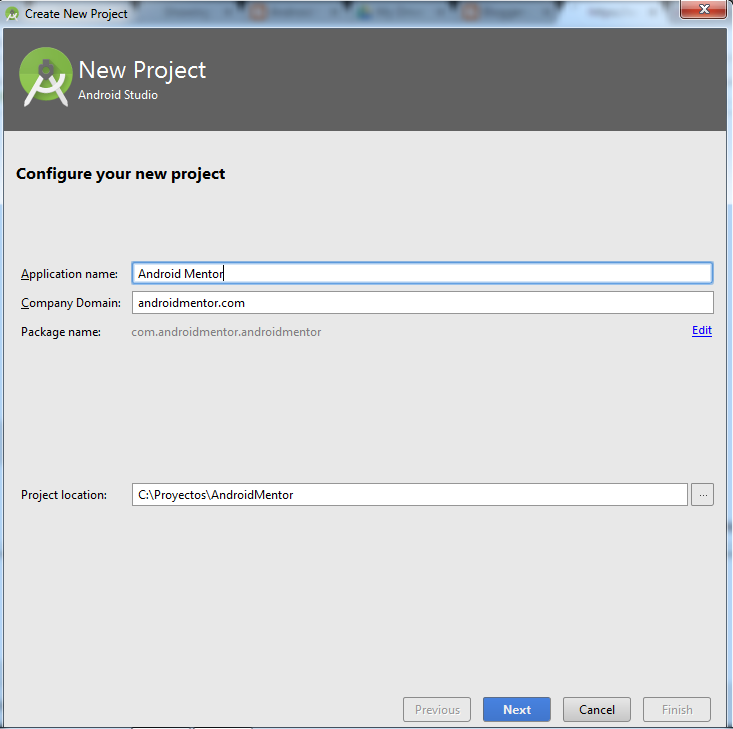
> In the next form, fill in the name of the Application, the package name( this can be your website address), and project location (which you can leave it for the default) and click Next.
> Choose the target devices that your app will run on under the phone and tablets place ( don't check the other checkboxes) and click Next.
* Best of practise, choose a minimum sdk of api 14, i.e android version 4.0; thus your app will run on any phone or tablet that has android version 4.0 and above,

> Then you choose an Activity you want for your application, for a start, just choose Empty Activity,.
as you advance, you'll be able to know how to work with the other activities; click Next;

> For the next form, which prompts you the customization of the activity, just leave the defaults and click Finish.

> Gradle will synchronous for some few seconds and your project will be ready to start coding and running.
project structure:

When everything is ready, under your package, e.g com.androidmentor.androidmentor, you'll have a MainActivity.java file:
package com.androidmentor.androidmentor;

import android.support.v7.app.AppCompatActivity;
import android.os.Bundle;

public class MainActivity extends AppCompatActivity {

    @Override    protected void onCreate(Bundle savedInstanceState) {
        super.onCreate(savedInstanceState);
        setContentView(R.layout.activity_main);
    }
}
And under the layouts, you'll see activity_main.xml:
<?xml version="1.0" encoding="utf-8"?>
<RelativeLayout xmlns:android="http://schemas.android.com/apk/res/android"
xmlns:tools="http://schemas.android.com/tools"
android:layout_width="match_parent"
android:layout_height="match_parent"
android:paddingBottom="@dimen/activity_vertical_margin"
android:paddingLeft="@dimen/activity_horizontal_margin"
android:paddingRight="@dimen/activity_horizontal_margin"
android:paddingTop="@dimen/activity_vertical_margin"
tools:context=".MainActivity">

    <TextView
android:layout_width="wrap_content"
android:layout_height="wrap_content"
android:text="Hello World!" />
</RelativeLayout>
You'll also have a AndroidManifest.xml file that should look this way:
<?xml version="1.0" encoding="utf-8"?>
<manifest xmlns:android="http://schemas.android.com/apk/res/android"
package="com.androidmentor.androidmentor">

    <application
android:allowBackup="true"
android:icon="@mipmap/ic_launcher"
android:label="@string/app_name"
android:supportsRtl="true"
android:theme="@style/AppTheme">
        <activity android:name=".MainActivity">
            <intent-filter>
                <action android:name="android.intent.action.MAIN" />

                <category android:name="android.intent.category.LAUNCHER" />
            </intent-filter>
        </activity>
    </application>

</manifest>
Running your Project
> On the toolbar, press the run button ,
,> Android studio will prompt you for a target to deploy your app., this is where you can choose a phone, or emulator.

- For the phone, you must have connected it to the laptop via USB and enabled developer mode in the phone settings , and accepted the debug key when the phone prompts you.
- For the emulator, you only need to fire it up and its ready for deployment.. for my case ill use genymotion as my emulator.
> After your app is deployed in the emulator successfully, you should see the app like this, with a hello world text.

That's it, You've successfully created your first android application.


The blog gave me idea to create and run android app The screen shots shared are very much useful My sincere thanks for sharing this post and please continue to share this kind of post
ReplyDeleteAndroid Training in Chennai
really you have posted an informative blog. before i read this blog i didn't have any knowledge about this but now i got some knowledge.
ReplyDeleteandroid training in chennai
Given so much info in it, These type of articles keeps the users interest in the website, and keep on sharing more ... good luck.
ReplyDeleteAndroid Training in Chennai
This is good piece of writing and pleasant urging commented
ReplyDeletehere, I am really enjoying by these.
appvn